This tutorial will guide you on how to enable obfuscation if you use GitHub workflow to build and deploy your .NET applications.
Contents
What are GitHub Workflows?
Today, GitHub is more than just a storage for your code. With its help you can build and deploy your applications by defining a set of tasks that are executed by the event, for example, when someone pushes changes to the master branch of your repository.
From time to time .NET developers wonder how to integrate obfuscation into this process. Let’s create a sample project, set up a repository on GitHub for it, and configure a workflow to build the application. Then we will integrate obfuscation, and also learn how to provide a license key for the .NET obfuscator.
The sample application: password validator.
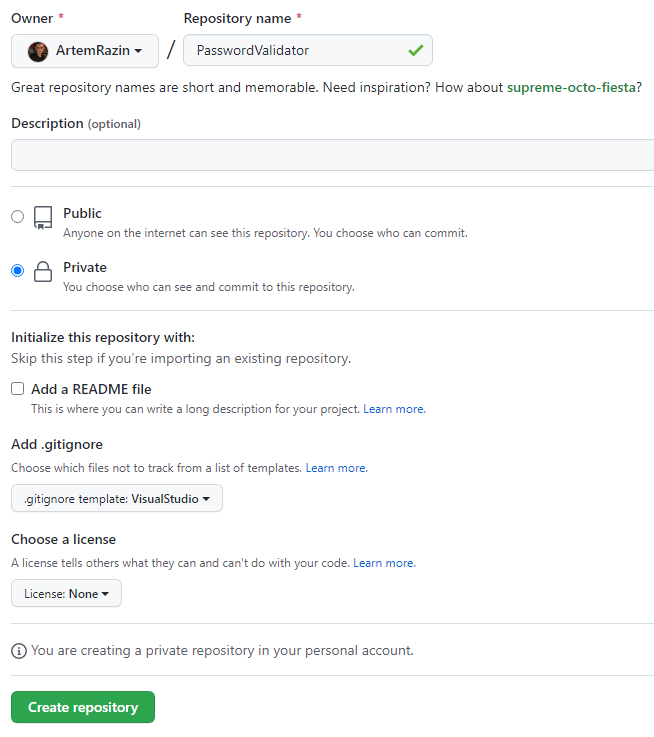
First, create a new private repository with a .gitignore for Visual Studio:
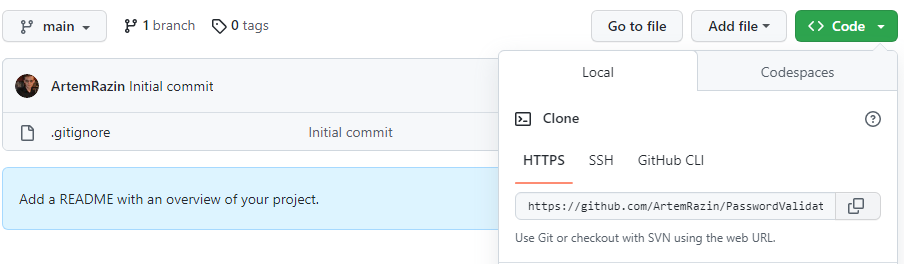
Once the repository is ready, click Code and copy the URL of the repository:
Clone it on the local computer. Then create a skeleton of the console application, and add it to the new solution file:
dotnet new console --use-program-main
dotnet new sln
dotnet sln add PasswordValidator.csproj
The solution file will help us to build the project.
Open Program.cs and edit as shown below:
using System;
using System.Text;
using System.Security.Cryptography;

namespace PasswordValidator;

class Program
{
    static void Main(string[] args)
    {
        using (var sha256 = SHA256.Create())
        {
            Console.Write("Enter password: ");
            var password = Console.ReadLine();

            var hash = sha256.ComputeHash(Encoding.UTF8.GetBytes(password));
            Console.WriteLine(string.Format($"Password hash: {Convert.ToBase64String(hash)}"));
        }
    }
}
This code reads the entered string, calculates its hash and outputs it in readable form.
Build it and run. Then enter github (it will be the correct password) and copy the hash value:
dotnet build
bin\Debug\net7.0\PasswordValidator.exe
Enter password: github                                                                                                                                                                                             Password hash: wLAQnZQ53lf+PPA6vsy8UvTJgXDHMtO2mvXmOVrOV04=
Now we know the hash of the valid password so we can check passwords:
using System;
using System.Text;
using System.Security.Cryptography;

namespace PasswordValidator;

class Program
{
    static void Main(string[] args)
    {
        using (var sha256 = SHA256.Create())
        {
            Console.Write("Enter password: ");
            var password = Console.ReadLine();

            if (Convert.ToBase64String(sha256.ComputeHash(Encoding.UTF8.GetBytes(password))) == "wLAQnZQ53lf+PPA6vsy8UvTJgXDHMtO2mvXmOVrOV04=")
                Console.WriteLine("Valid");
            else
                Console.WriteLine("Not valid");
        }
    }
}
Build it and run to ensure it works as expected:
>dotnet build
>bin\Debug\net7.0\PasswordValidator.exe                                                                                                                                               Enter password: tratata                                                                                                                                                                                            Not valid                                                                                                                                                                                                                                                                                                                                                                                                                            >bin\Debug\net7.0\PasswordValidator.exe                                                                                                                                               Enter password: github                                                                                                                                                                                             Valid
Commit changes to GitHub. Now let’s look at how to create a workflow, building the application.
Configure a workflow to build the .NET application.
To add a workflow you need to create a new file in .github/workflows. So create .github, enter it, then create workflows and finally create build.yaml that contains steps required to build the application:
on: [push]

jobs:
  build:

    runs-on: ubuntu-latest
    strategy:
      matrix:
        dotnet-version: [ '7.0.x' ]

    steps:
      - uses: actions/checkout@v3
      - name: Setup .NET SDK ${{ matrix.dotnet-version }}
        uses: actions/setup-dotnet@v3
        with:
          dotnet-version: ${{ matrix.dotnet-version }}
      - name: Install dependencies
        run: dotnet restore
      - name: Build
        run: dotnet build --configuration Release --no-restore
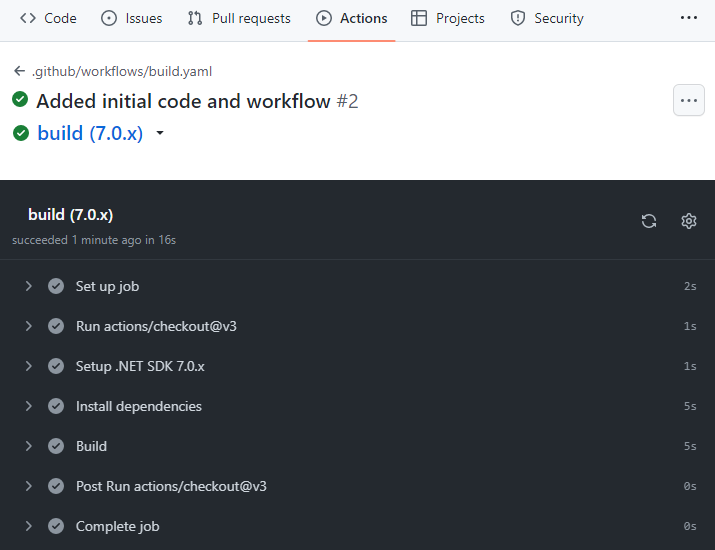
Commit build.yaml and then navigate to Actions on GitHub. You will see that the application has been built well:
Enable obfuscation
It’s time to enable obfuscation for the project. Add the following packages:
dotnet add package ArmDot.Client
dotnet add package ArmDot.Engine.MSBuildTasks
ArmDot.Client provides obfuscation attributes that you can use to specify obfuscation options for classes, methods or even the entire assembly. ArmDot.Engine.MSBuildTasks contains the obfuscation task that you enable in the project file.
First, let’s specify that we want to virtualize Main. Virtualization is one of the obfuscation approaches that turns original method to a mess of instructions:
using System;
using System.Text;
using System.Security.Cryptography;

namespace PasswordValidator;

class Program
{
    [ArmDot.Client.VirtualizeCode]
    static void Main(string[] args)
    {
        using (var sha256 = SHA256.Create())
        {
            Console.Write("Enter password: ");
            var password = Console.ReadLine();

            if (Convert.ToBase64String(sha256.ComputeHash(Encoding.UTF8.GetBytes(password))) == "wLAQnZQ53lf+PPA6vsy8UvTJgXDHMtO2mvXmOVrOV04=")
                Console.WriteLine("Valid");
            else
                Console.WriteLine("Not valid");
        }
    }
}
It’s not enough to add an obfuscation attribute. Also you need to enable the obfuscation task. Modify PasswordValidator.csproj as shown below:
<Project Sdk="Microsoft.NET.Sdk">

  <PropertyGroup>
    <OutputType>Exe</OutputType>
    <TargetFramework>net7.0</TargetFramework>
    <ImplicitUsings>enable</ImplicitUsings>
    <Nullable>enable</Nullable>
  </PropertyGroup>

  <ItemGroup>
    <PackageReference Include="ArmDot.Client" Version="2023.7.0" />
    <PackageReference Include="ArmDot.Engine.MSBuildTasks" Version="2023.7.0" />
  </ItemGroup>

<Target Name="Protect" AfterTargets="AfterCompile" BeforeTargets="BeforePublish">
  <ItemGroup>
     <Assemblies Include="$(ProjectDir)$(IntermediateOutputPath)$(TargetFileName)" />
  </ItemGroup>
  <ArmDot.Engine.MSBuildTasks.ObfuscateTask
    Inputs="@(Assemblies)"
    ReferencePaths="@(_ResolveAssemblyReferenceResolvedFiles->'%(RootDir)%(Directory)')"
    SkipAlreadyObfuscatedAssemblies="true"
  />
</Target>

</Project>
The new target Protect contains the obfuscation task that obfuscates the compiled assembly immediately after the compiler places it to the intermediate directory.
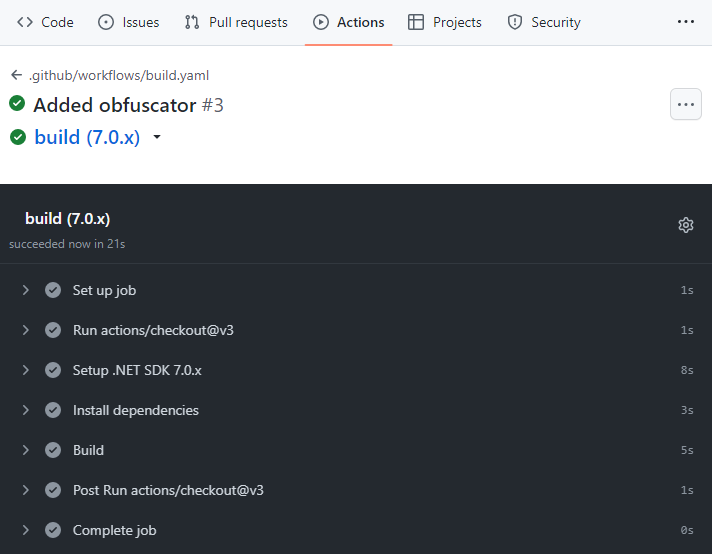
Rebuild the project and run it to check if it works well. After that push changes to the repository and look if the job has worked without problems:
How to specify your license for the obfuscator?
If you use the full version of the obfuscator, you have a license key. When you develop on the local computer, your license key is just located in the default location. Of course, one can’t just place the license key to the repository. The question is where to store it if you want to use the full version of the .NET obfuscator in a GutHub workflow. Encrypted secrets to the rescue!
Navigate your repository on GitHub, then click Settings, expand Secrets and variables, and click Actions, and New repository secret. Name it ARMDOT_LICENSE_KEY and paste your license (it’s crucial to put your license in a single line). Then click Add secret:
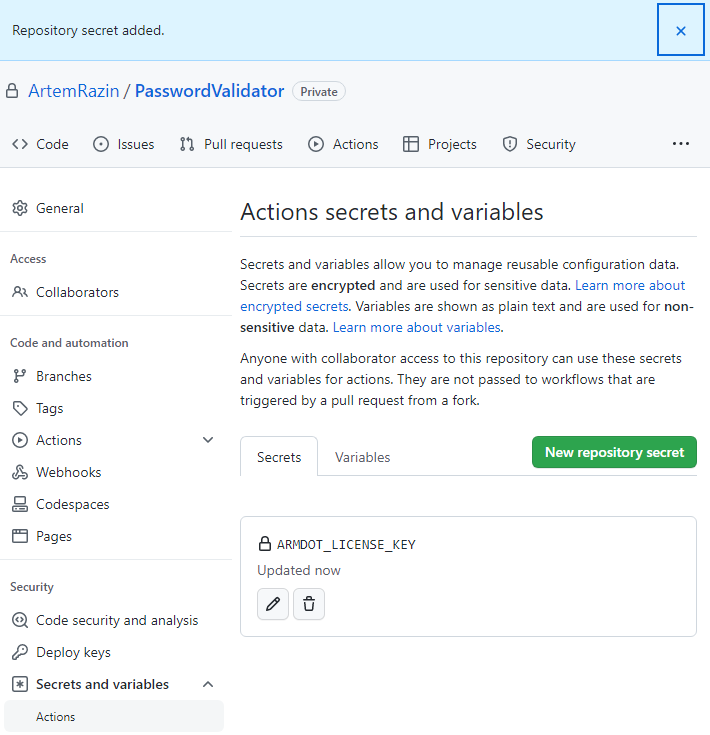
To utilize the license key, you must first update the workflow. Below is a sample for you if you are using Linux:
on: [push]

jobs:
  build:

    runs-on: ubuntu-latest
    strategy:
      matrix:
        dotnet-version: [ '7.0.x' ]

    steps:
      - uses: actions/checkout@v3
      - name: Setup .NET SDK ${{ matrix.dotnet-version }}
        uses: actions/setup-dotnet@v3
        with:
          dotnet-version: ${{ matrix.dotnet-version }}
      - name: Install dependencies
        run: dotnet restore
      - name: Save license
        run: |
          echo $ARMDOT_LICENSE_KEY >> ${{ runner.temp }}/ArmDotLicenseKey
        shell: bash
        env:
          ARMDOT_LICENSE_KEY : ${{ secrets.ARMDOT_LICENSE_KEY }}
      - name: Build
        run: dotnet build --configuration Release --no-restore
        env:
          ARMDOT_LICENSE_FILE_PATH : ${{ runner.temp }}/ArmDotLicenseKey
If you are using Windows, you need to use cmd as a shell. In this case, it’s critical to input your license key on a single line, as cmd does not support values across multiple lines:
on: [push]

jobs:
  build:

    runs-on: windows-2022
    strategy:
      matrix:
        dotnet-version: [ '7.0.x' ]

    steps:
      - uses: actions/checkout@v3
      - name: Setup .NET SDK ${{ matrix.dotnet-version }}
        uses: actions/setup-dotnet@v3
        with:
          dotnet-version: ${{ matrix.dotnet-version }}
      - name: Install dependencies
        run: dotnet restore
      name: Save license
        run: |
          echo "%ARMDOT_LICENSE_KEY%" >> ${{ runner.temp }}\ArmDotLicenseKey
        shell: cmd
        env:
          ARMDOT_LICENSE_KEY : ${{ secrets.ARMDOT_LICENSE_KEY }}
      - name: Build
        run: dotnet build --configuration Release --no-restore
        env:
          ARMDOT_LICENSE_FILE_PATH : ${{ runner.temp }}/ArmDotLicenseKey
The trick is to place the license key to a temporary file and then pass the path of the file in the environment variable ARMDOT_LICENSE_FILE_PATH. This approach works with any tool you use to build your project, dotnet build, or MSBuild.
Let’s use this variable. Modify PasswordValidator.csproj:
<Project Sdk="Microsoft.NET.Sdk">

  <PropertyGroup>
    <OutputType>Exe</OutputType>
    <TargetFramework>net7.0</TargetFramework>
    <ImplicitUsings>enable</ImplicitUsings>
    <Nullable>enable</Nullable>
  </PropertyGroup>

  <ItemGroup>
    <PackageReference Include="ArmDot.Client" Version="2023.7.0" />
    <PackageReference Include="ArmDot.Engine.MSBuildTasks" Version="2023.7.0" />
  </ItemGroup>

<Target Name="Protect" AfterTargets="AfterCompile" BeforeTargets="BeforePublish">
  <ItemGroup>
     <Assemblies Include="$(ProjectDir)$(IntermediateOutputPath)$(TargetFileName)" />
  </ItemGroup>
  <ArmDot.Engine.MSBuildTasks.ObfuscateTask
    Inputs="@(Assemblies)"
    ReferencePaths="@(_ResolveAssemblyReferenceResolvedFiles->'%(RootDir)%(Directory)')"
    SkipAlreadyObfuscatedAssemblies="true"
    LicenseFile="$(ARMDOT_LICENSE_FILE_PATH)"
  />
</Target>

</Project>
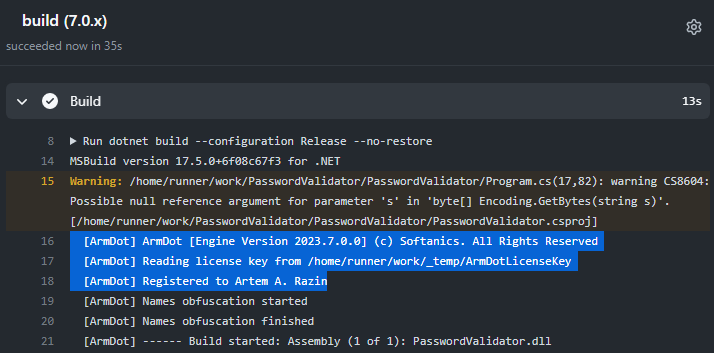
Push the changes and check if it works well now:
Conclusion
With GitHub workflows, building and deploying .NET applications is extremely easy and efficient. With the help of ArmDot, a modern cross platform obfuscator, you can integrate obfuscation into workflows in a minute.